![]()
 Make
Your Own Squat Rack
Make
Your Own Squat Rack
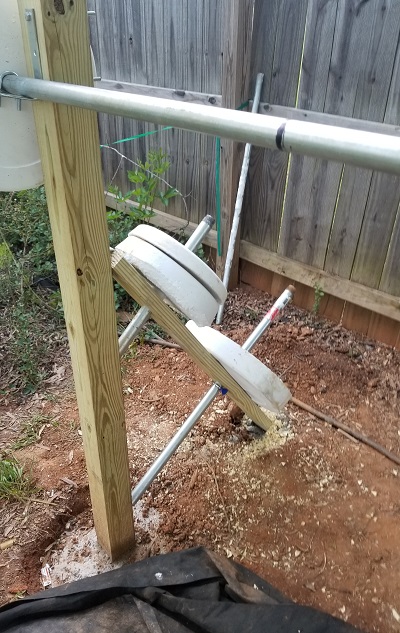
Step 8 - Plate holder and Brace
If you want a place to stack the plates to keep them clean, off the ground and easier to get to, this simple holder doubles as an additional brace for the structure. You just need one 2 by 4 that is 10 feet long,
It is quite simple.
- Cut the 2 by 4 in half (to make two 5 ft long pieces)
- Dig a hole for each brace in a position that makes the braces about 45 degree angle as shown in the photo.
- Bend 2 L-braces to fit (see photo below) I just used a hammer to pound them into shape. These securely hold the top of each brace against the rack's 4 by 4's.
- Mix concrete and pour around the base of each brace.
- Allow the cement to cure (24 to 48 hours)
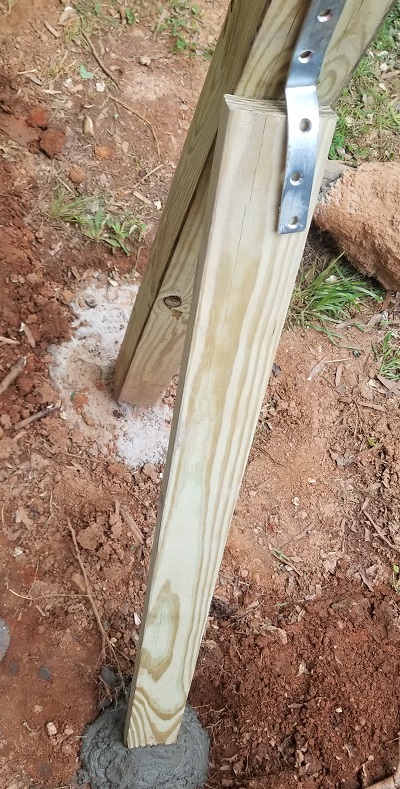
- secure the L-brackets in place (I used 1.5 inch 1/4 inch diameter lag screws against the 4 by 4's and one 3 inch long 1/4 inch diameter bolt on the 2 by 4.
- Cut 2 holes (1 and 3/8 inch diameter) in each brace (4 by 4). I had to buy a larger bit for my drill. Measure the diameter and positions of the size of the plates first so you position the holes correctly.
- Use leftover pieces of pipe. I found 3 ft worked well for the lower plate holder and 18 inches for the top. If you don't have any leftover pipe, you can get it at Home Depot or Lowes and generally, they will cut it for to you! I found a cordless reciprocating saw with a metal-cutting blade did the job quickly and easily.
- To keep the pipes in place, use a 1.5 inch hose clamp on the pipe just under the 2 by 4.
- That's it!
Steps
- Dig the post holes
- Mix the concrete and level the 4x4's
- Bend the brackets
- Attach the first bracket
- Determine level and attach the second bracket
- Cut grooves / channel for chin-up bar on top of each 4x4.
- Bolt down chin-up bar